
Project Details
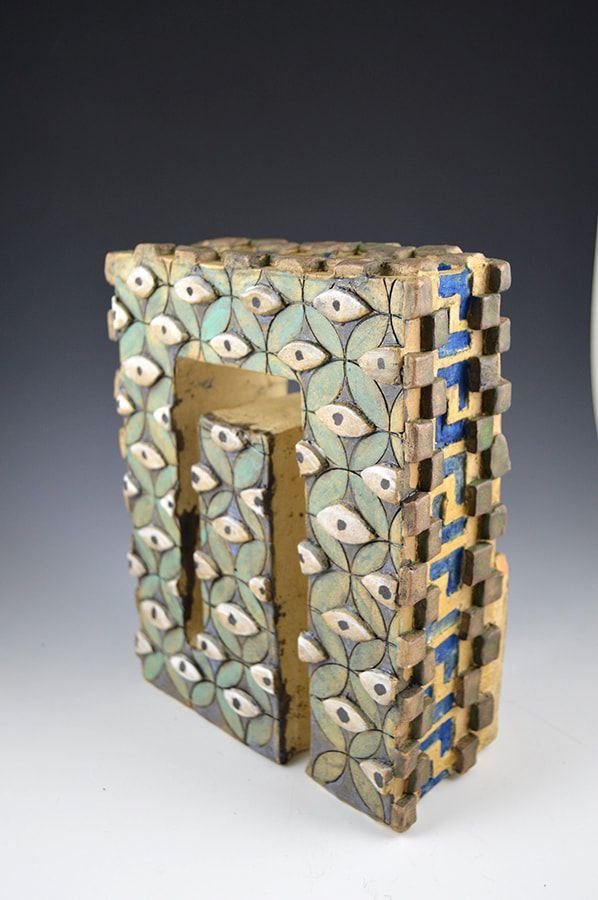
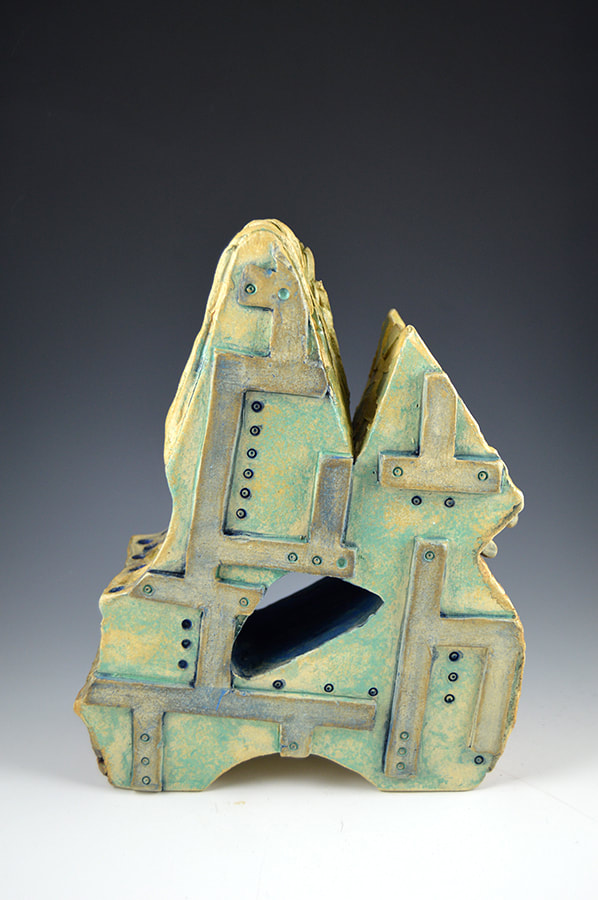
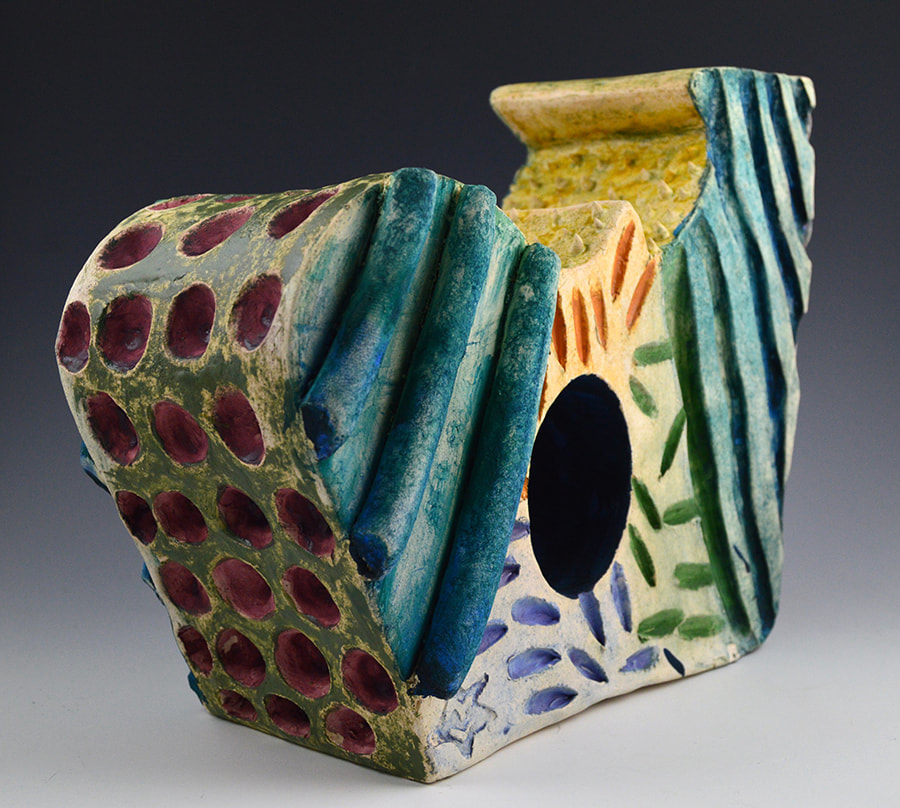
Create a textural sculpture using the slab construction method.
Project Specs
Deliverables
Create a textural sculpture using the slab construction method.
Project Specs
- Slab construction
- Sculpt: 8" x 10.5" x (2.5" to 4") sculpture - can be landscape or portrait orientation but depth must be between 2.5" to 4"
- Negative space: 1 to 2 negative spaces that are at least 2" from any edge
- Design: Must focus on relief texture (additive, subtractive, impressed), positive / negative space relationships, and communication between curvilinear and straight edges.
Deliverables
- Textural sculpture form with proper application of surface - bisque and glaze fired by deadline.
Preliminaries
- Email
- What is slab construction?
- What is texture? What types of texture are there?
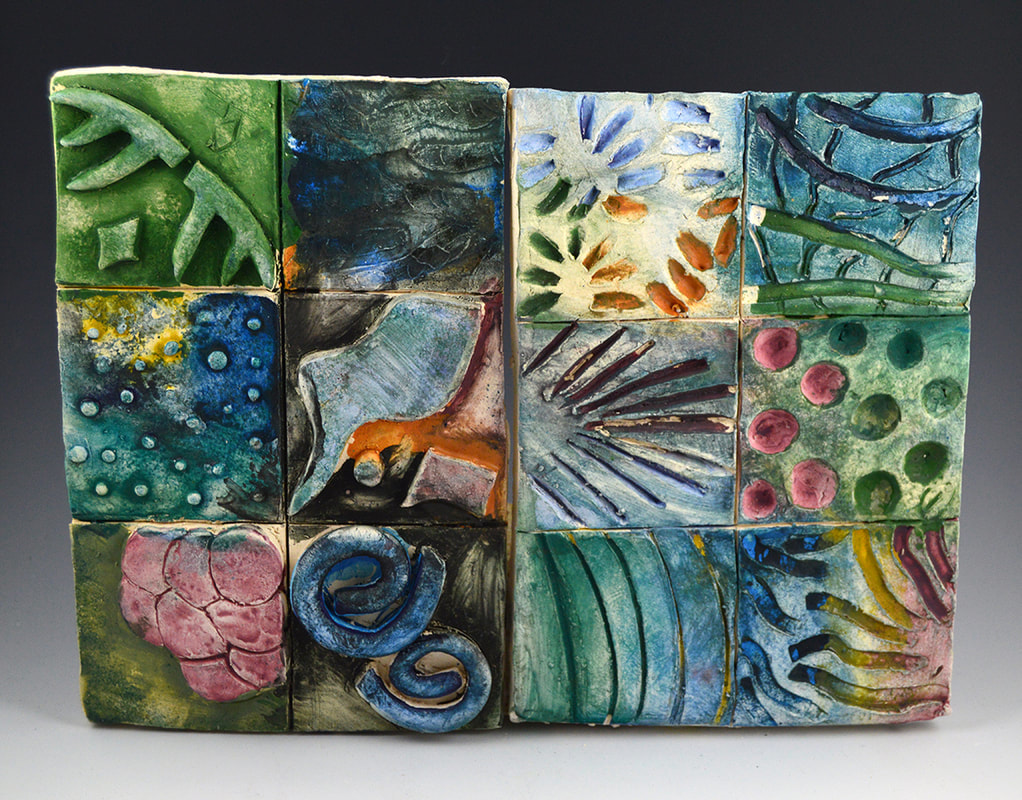
- Texture tiles - create 6 tiles that are 9" x 6" partitioned off into six 3" square sections.
- Make two with additive texture techniques
- Make two with subtractive texture techniques
- Make one with impressed texture techniques
- Make one with a combination of the three above techniques. Choose your favorite variations and combine them to make new patterns.
- Remember to take care and time to create interesting texture that emphasize imagery from your visual journals (I will as to see the reference images you used). Refine all edges so there are no pointy sharp parts - we will be using these to test our surface techniques.
- Form Design
- 48 proportionate, thumbnail sketches.
- 3 full-scale (8" x 10.5") of final choices. Professor approval required to move forward with final design.
- Texture Design
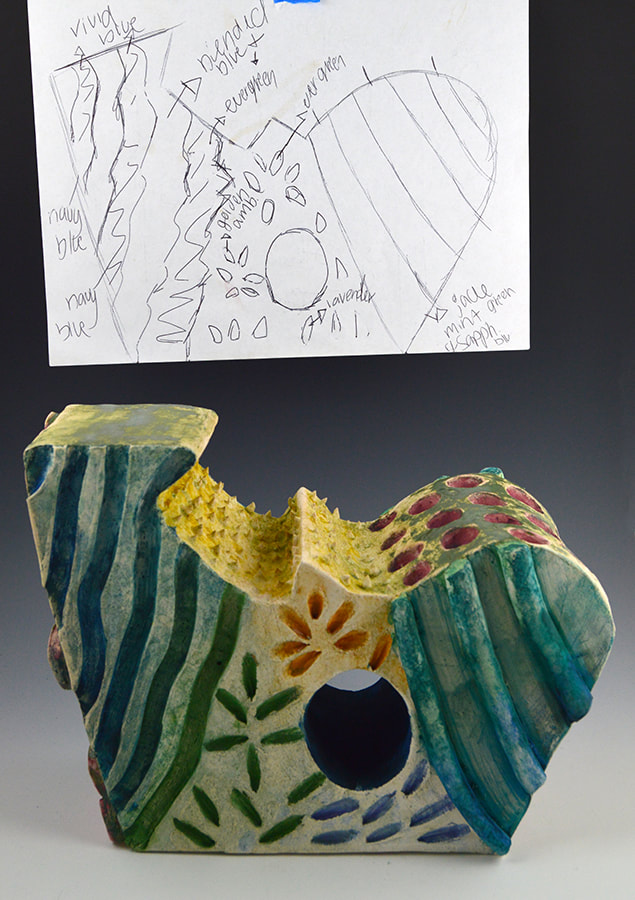
- Draw three, full-scale variation of the texture you wish to create on the surface of your form.
- Surface Design
- Draw three, full-scale variations of the colors you wish to use on your form.
Construction Process
- Roll out slabs that are 3/8" thick
- For the front and back
- two - 8.5" x 11"
- dry these to leather hard.
- two - 8.5" x 11"
- For the sides
- several slabs that are between 2.5" to 4" wide for the sides
- you will need between 10" to 20" of length - make a few extra incase you need them
- dry some of these to leather hard and keep a few more moist so they can bend around the curves of your design
- several slabs that are between 2.5" to 4" wide for the sides
- For the front and back
- Cutting the front and back
- Use your drawing as a stencil to cut out the front and back slabs;
- Wrap one in plastic and save for later
- Use one for the base and begin to build your walls up
- Use your drawing as a stencil to cut out the front and back slabs;
- Cutting the walls
- Determine the depth between 2.5" to 4". Cut the rest of the slabs as long and straight as possible to the chosen depth.
- Set aside under plastic if necessary - remember keep some leather hard and others softer.
- Building the walls
- Use the narrow slabs to build up the walls of your form - leather hard slabs for straight edges and softer slabs for curved sections.
- Start at one end and continue butting each wall slab to the one next to it until you completely circumnavigate the form.
- Score and slip properly.
- Place "caulk" beads of soft clay around the interior where slab walls meet the base.
- Adding the back
- Add the second large slab on top of the walls, be careful to line them up correctly.
- Score and slip properly.
- Finalization of Form
- Be sure all slabs are joined correctly, there are no cracks, indents, sharp edges.
- Smooth and refine as we have the previous projects. This is an integral step before adding your texture.
- Add texture to the Form
- Think about how the texture flows over the surface and guide the viewers eye. How different textures communicate a certain message. Plan wisely.
- Each side must contain a different texture or combination of textures from your test tiles.
Define Design Problem
Research & Collect Info - take notes during hands-on demonstrations, watch tutorials, read some literature, search the internet, gather reference images, etc.
Start with the following:
Brainstorm
Develop
Get Feedback / Seek Critique
Refine
Submit
- Restate the project guidelines in your own words to be sure you understand the process and goals.
- What are you trying to communicate?
- Who is your audience? How do you want your audience to feel when viewing your work? What message should your audience take away?
Research & Collect Info - take notes during hands-on demonstrations, watch tutorials, read some literature, search the internet, gather reference images, etc.
Start with the following:
- Define asymmetry, vessel, sculpture, and engobe.
- What is coil building?
Brainstorm
- Draw 48 thumbnails (use the template below)
- Choose the most interesting 3 and draw them at a larger scale. Refine the forms further to to create balance and visual interest.
Develop
- Choose the most interesting one and draw it to scale - perfectly. This is your template for construction, any flaw will only magnify when you begin construction.
- Sculpt a maquette - a sculptor's small preliminary model or sketch.
- Sculpt the final asymmetrical vessel to scale (5" x 12").
Get Feedback / Seek Critique
- In this course we will seek feedback throughout the entire design / construction process.
Refine
- Improve your design based on the feedback given.
Submit
Resources
|
|